Even beginners can perfectly photoshop remove Text from image in just five simple steps
Nothing is more frustrating than a perfect photo ruined by unwanted Text. A distracting watermark is just as annoying. You've likely tried to fix it yourself. But the result is often a smudged, blurry mess. It looks even worse than the original. It's an everyday struggle when you first try to photoshop remove Text from image.
For instance, in this subreddit discussion, users debated how to remove text while preserving paper textures. The community suggested using the Healing Brush tool manually, which is a key technique when you photoshop remove text from image on textured surfaces.
Any suggestions on how to remove text while keeping the paper background
But what if you could achieve flawless results in minutes? You can do this even as a complete beginner. This guide will teach you exactly that. It uses a proven 5-step method that demystifies the entire process. Forget the frustration. Stop wasting hours trying to figure it out on your own.
We will walk you through everything. This includes Photoshop's fantastic 'one-click' Content-Aware Fill. We also cover advanced techniques for handling Text on complex backgrounds.
By the end, you'll have absolute confidence. You will be able to photoshop remove Text from image with professional skill. Every picture will look pristine and untouched.
1.Why Professionals Still Prefer Photoshop Remove Text From Image Over Online Tools
1.1 The Convenience and Pitfalls of Online Tools
When you need to remove Text quickly, using a remove text from an image online tool seems tempting. They are often free and fast, requiring just a simple upload and a click.
However, this convenience comes at a cost. Many free services compress your image, reducing its quality by up to 60%. Additionally, your privacy is often not guaranteed. For any serious Photoshop remove Text from image task, they fall short.

1.2 The Rise and Limits of AI Tools
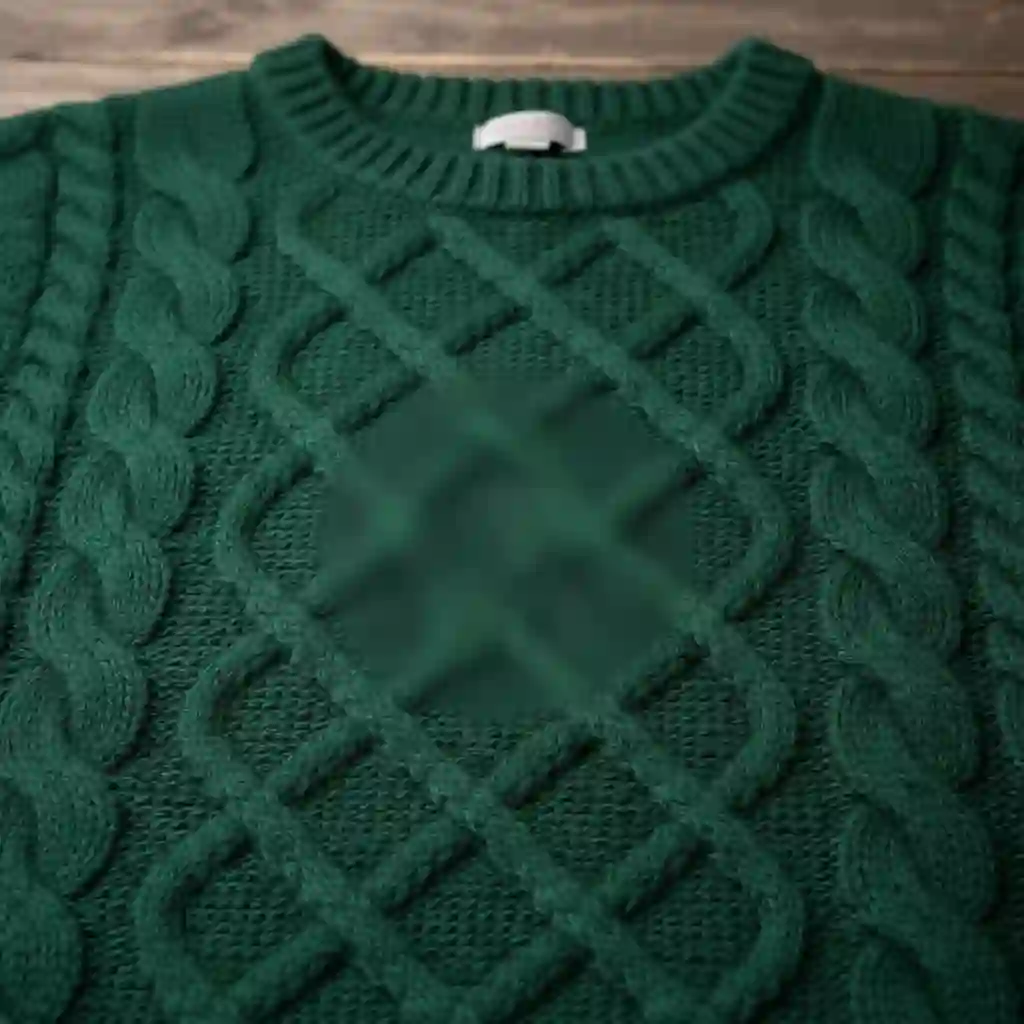
Next are the AI remove Text from image tools. They are smart at analyzing backgrounds. They fill them in for you. But their intelligence has limits. Text might sit on a complex texture. This could be a knitted sweater or wood grain.
In these cases, AI often creates a smooth patch. It looks fake. The patch lacks authentic detail. This artificial result fails professional standards. It cannot match a proper Photoshop remove Text from an image.
1.3 Photoshop's Ultimate Advantage
Pixel-Level Control This is why professionals trust Photoshop. It offers complete pixel-level control. No automated tool can match it. Using layers ensures your work is non-destructive. You can adjust it at any time. You can combine many tools. Use Content-Aware Fill, the Clone Stamp, and the Healing Brush.
This ensures precise cleanup. This control guarantees quality. Every Photoshop removes Text from the image, and edits blends well with the original background. You need flawless results. The control you get with photoshop remove Text from image is irreplaceable. This is why a professional Photoshop remove Text from image workflow remains the industry standard.

2.Preparation: Laying the Foundation is 90% of Successful Photoshop Text Removal
Before you start actual edits, take a few preparation steps. They determine your success or failure. Think of it as laying a solid foundation before building a house. A professional Photoshop remove Text from image workflow relies on these critical preparations.
2.1 The First Golden Rule: Duplicate the Layer.
Remember the first and most important rule in Photoshop. Never work on your original image. Press "Ctrl+J" (or "Cmd+J" on a Mac) to duplicate your background layer. This simple action creates a safe copy for you. You can work on this copy.
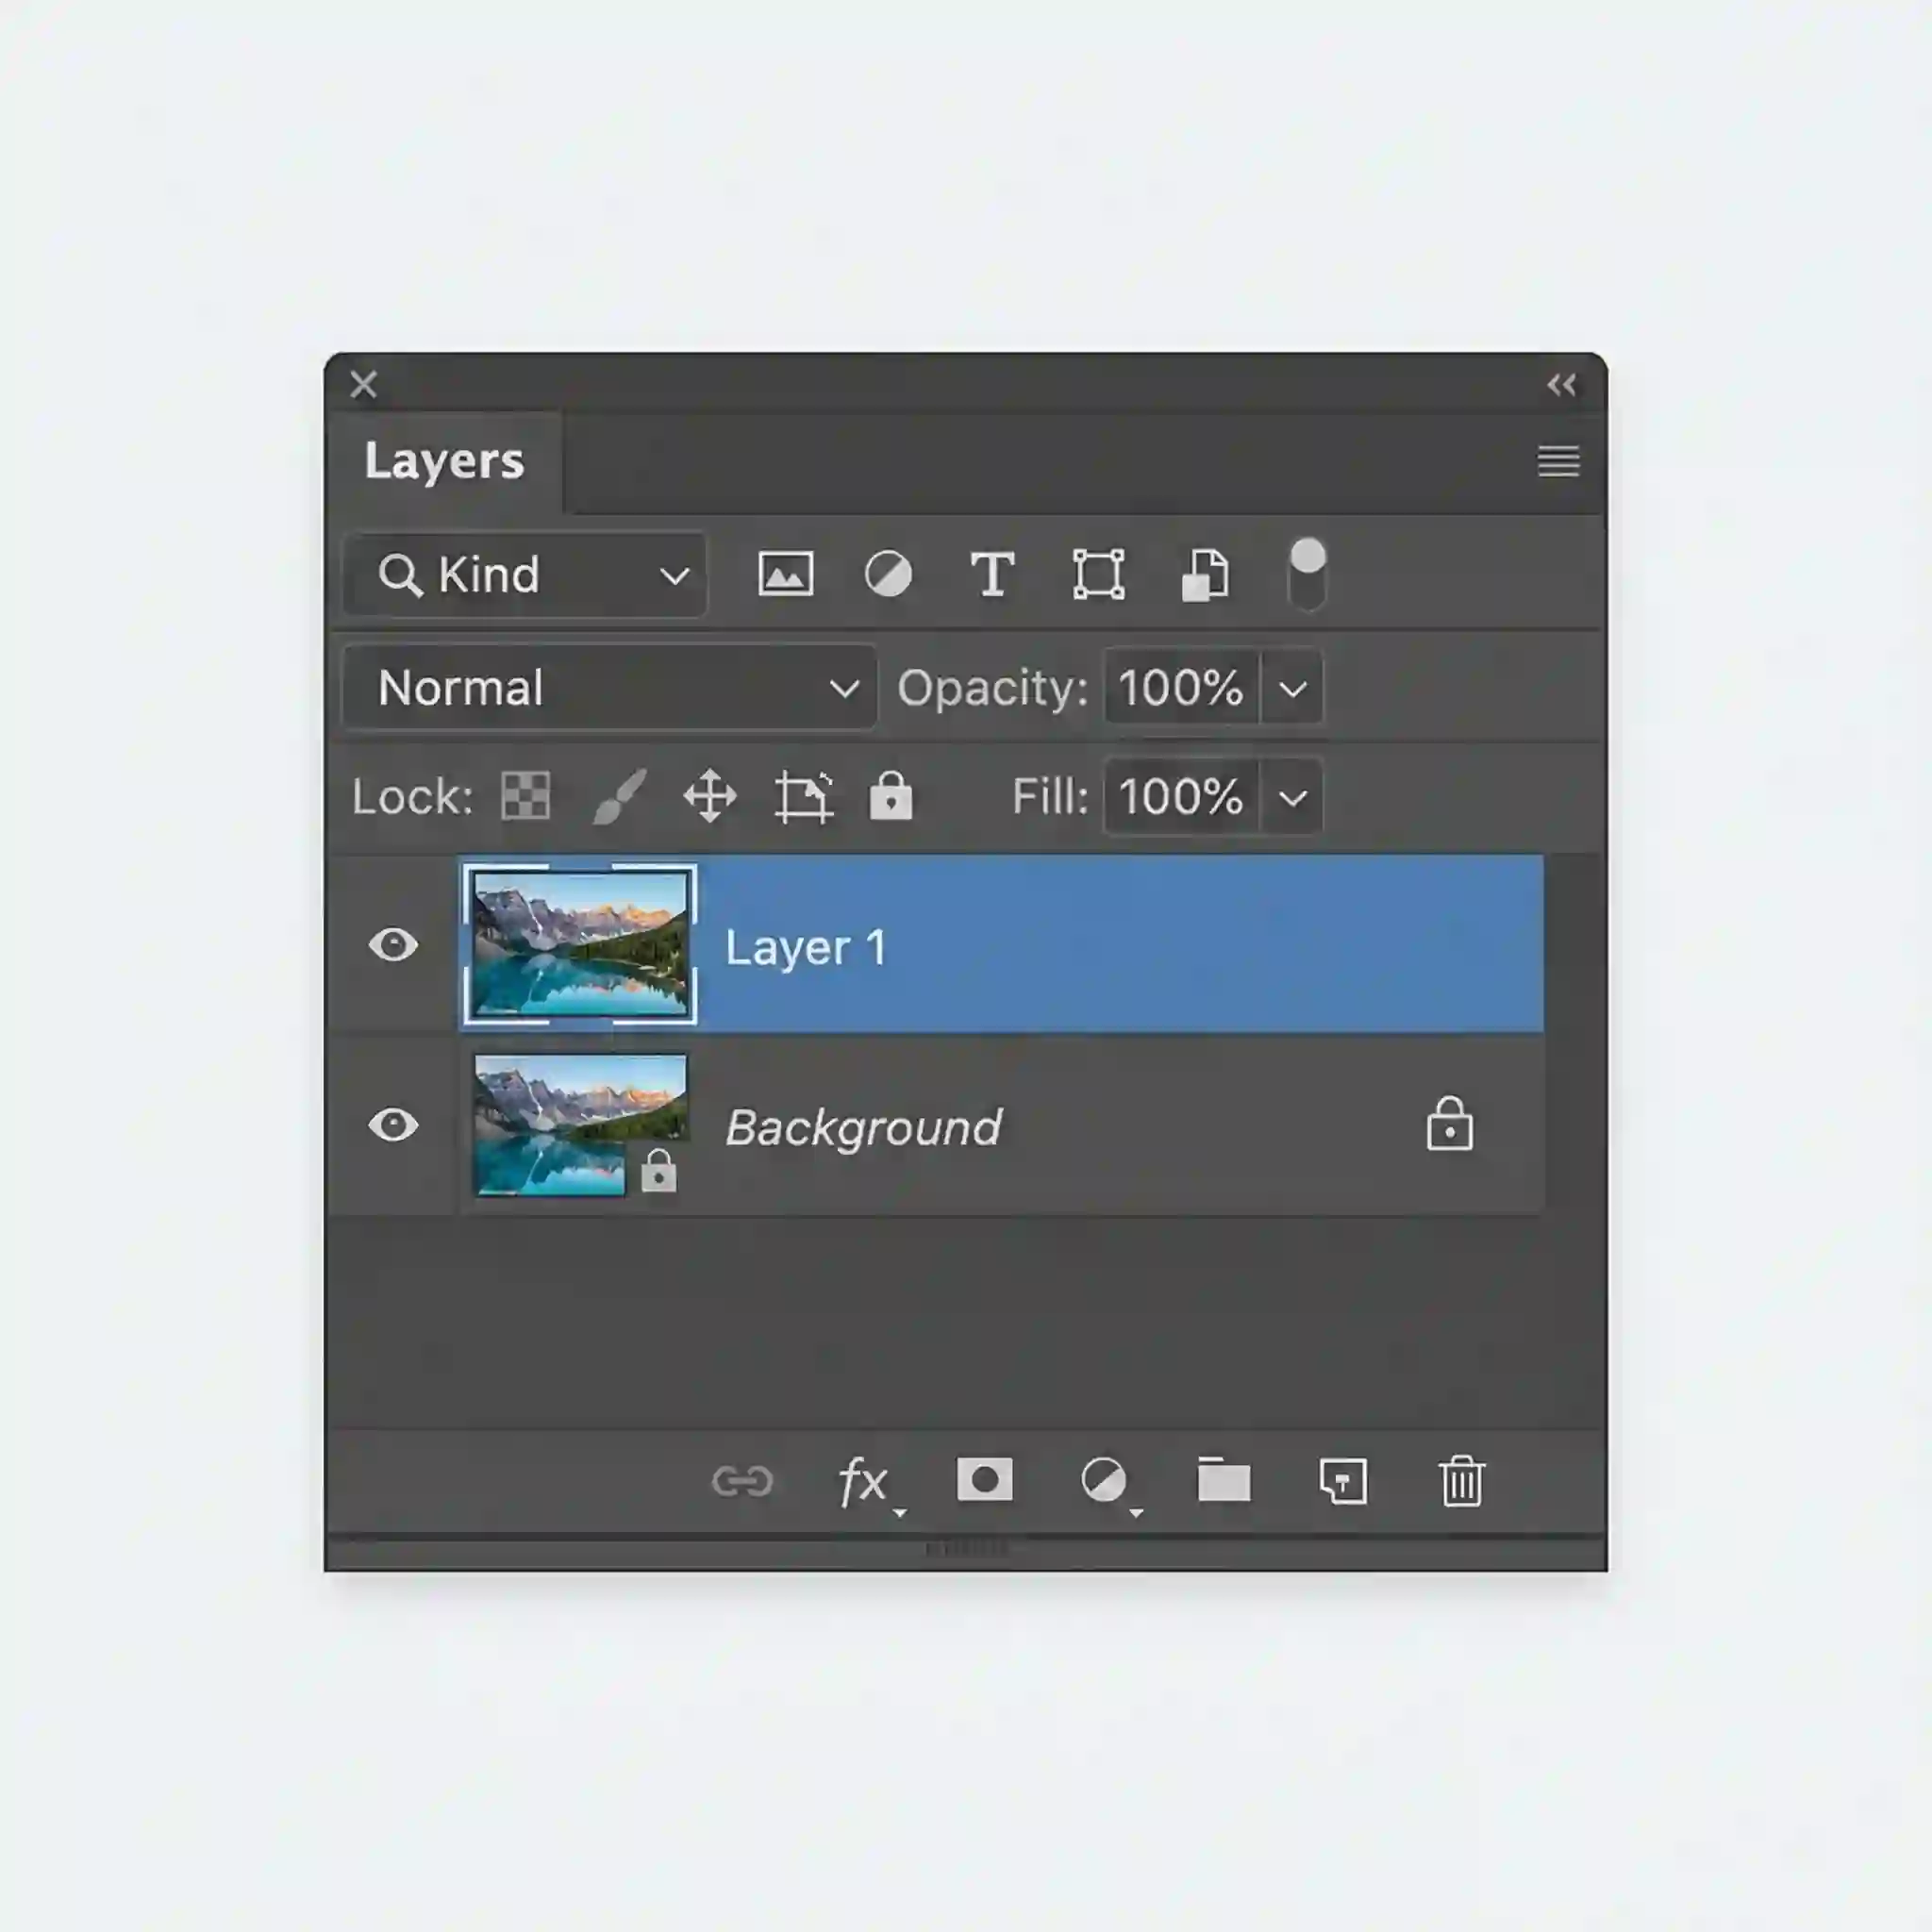
This means you can make mistakes. You will not damage your original photo. You have a foundation to erase Text without damaging the background. It is the correct way to start any professional photoshop remove Text from image job.
2.2 Choose the Right Selection Tool
The precision of your selection impacts the final quality. It defines the success of your photoshop remove Text from image edit. For square or rectangular Text, the Rectangular Marquee Tool is the fastest option.
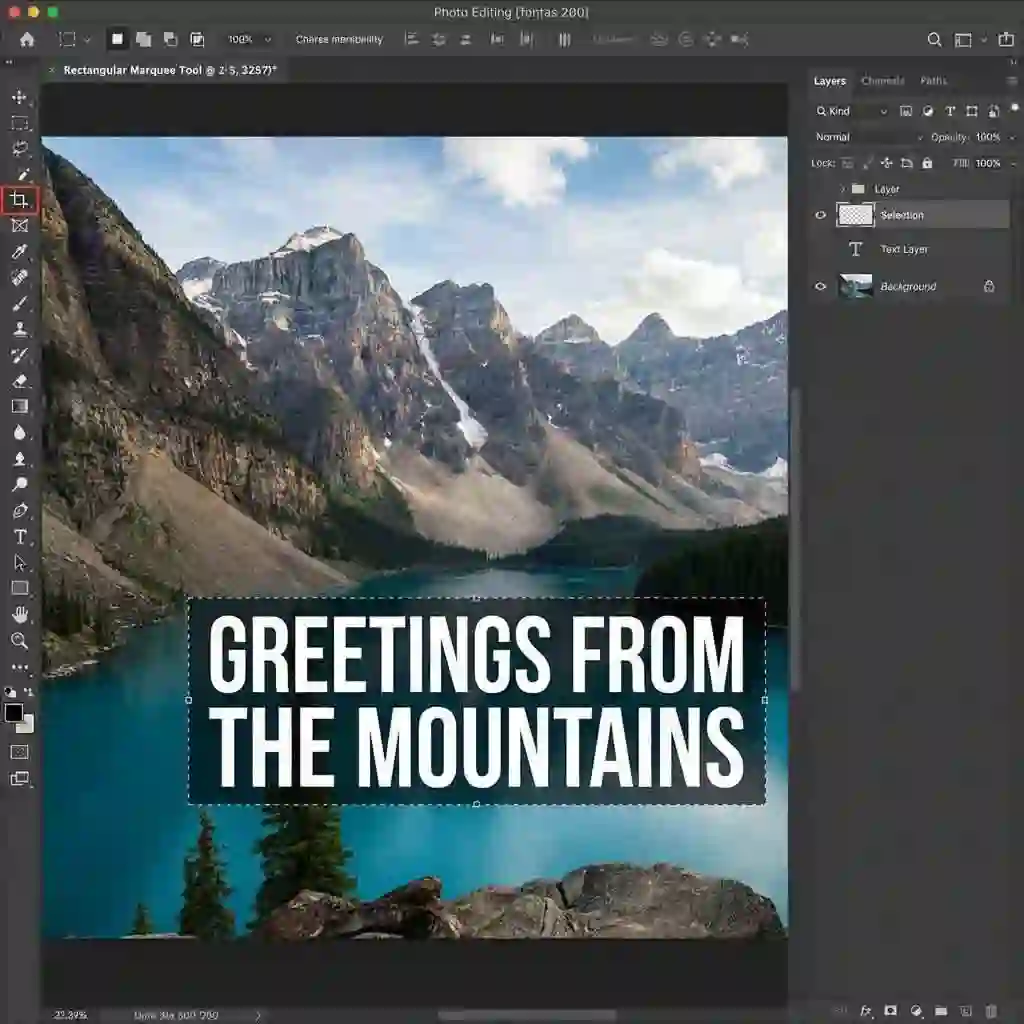
If the Text has an irregular shape, the Lasso Tool will be your best friend. Use the Object Selection Tool in newer Photoshop versions. It can identify the Text. It selects the Text for you. This makes cleaning up Text in a picture much easier.
2.3 Zoom In! Zoom In! Zoom In
To get clean edges, you need to see them well. Use the Zoom Tool. Or hold the "Alt" key and scroll your mouse wheel. Zoom in to 200% or more. This allows you to create a pixel-perfect selection right along the Text's border.
A tight selection is the secret. It lets you erase Text without damaging the background. It tells Photoshop exactly what to remove. This simple habit separates amateur results from professional ones. It is crucial for a perfect photoshop remove Text from image.
This is a simple tutorial suitable for beginners that demonstrates the use of basic tools. It directly addresses the common query on how to photoshop remove text from image using standard software features.
How to Remove Text from an Image in Photoshop
3.Core Magic: 5 Steps to Master Content-Aware Fill Text Removal
Now, let's get to the most exciting part. We are about to unveil one of Photoshop's most powerful features: Content-Aware Fill. This tool works like magic. It analyzes the background around your Text. It replaces it with a similar texture.
The result is seamless. Mastering this workflow is key to an efficient photoshop remove Text from image task. It's the go-to method. Almost every professional tries it first for a Photoshop remove Text from image job.
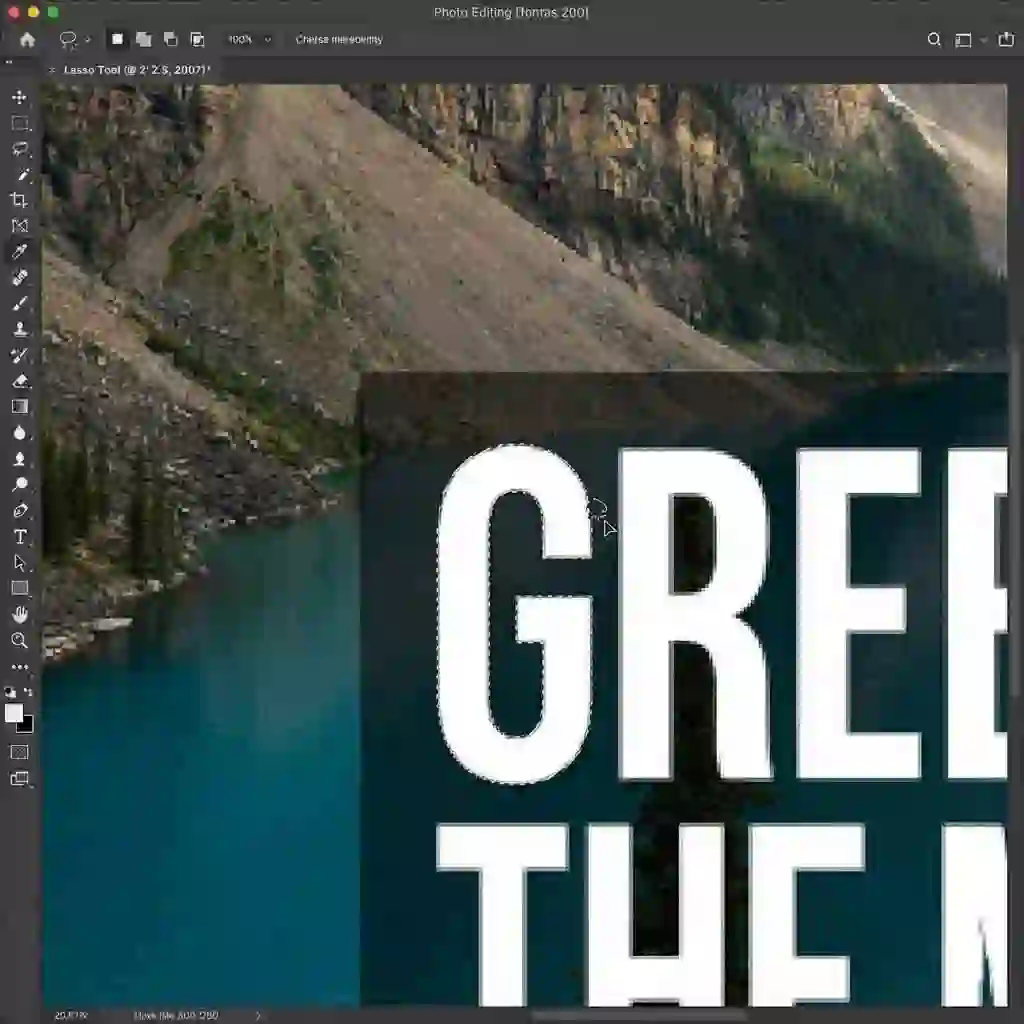
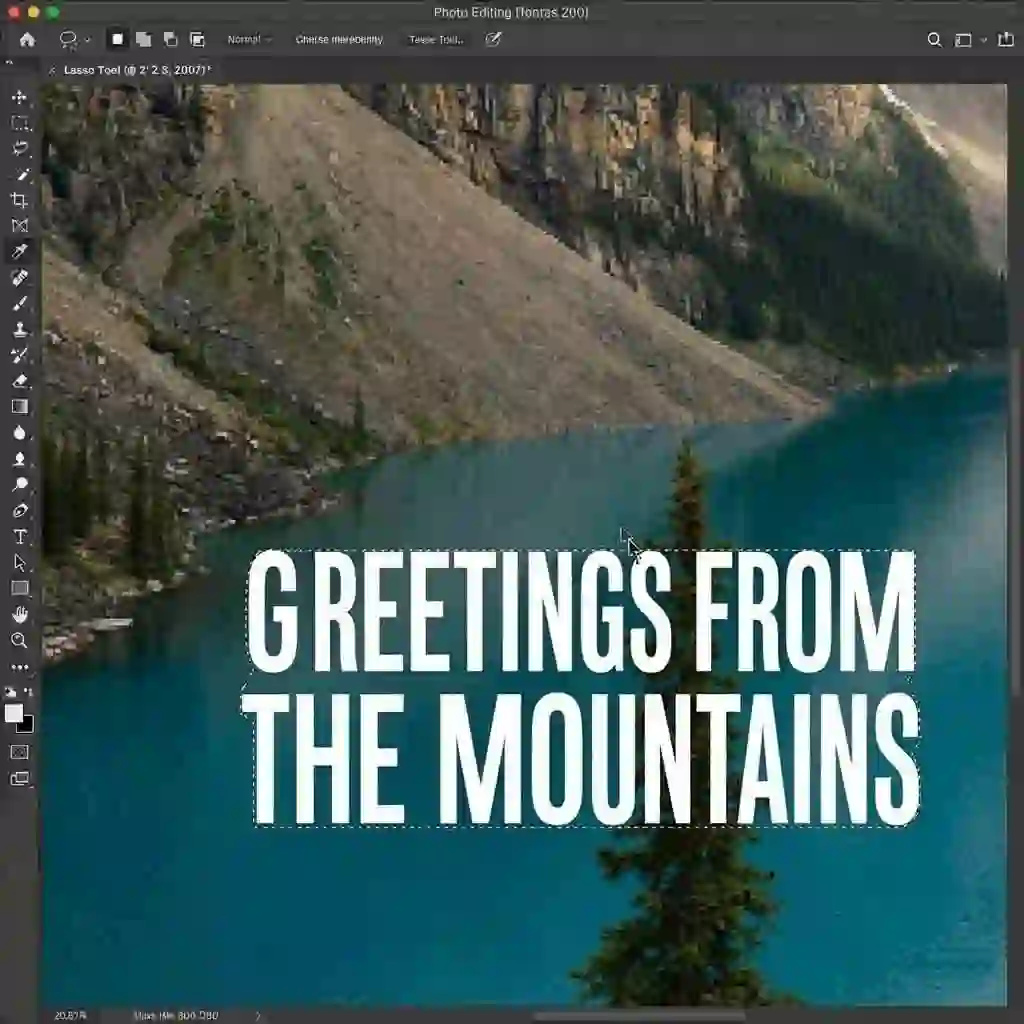
3.1 Step 1: Create a Precise Selection
Our journey to a perfect result begins with an ideal selection. Use the techniques from the previous chapter. Carefully trace around the Text you want to remove with the Lasso Tool.
Remember to keep the selection as tight as possible without leaving any pixels behind. A clean selection is the first step in any quality Photoshop remove Text from image process. It tells Photoshop exactly what your target is.
3.2 Step 2: Slightly Expand the Selection
This is a key trick that separates professionals from beginners. Text often has soft, anti-aliased edges. Filling it directly might leave a faint halo or outline. To completely erase Text without damaging the background, you must expand the selection slightly.
Go to the top menu and click "Select" > "Modify" > "Expand." Enter a value between 2 and 3 pixels and click OK. This small action includes every trace of the Text. It sets the stage for a flawless photoshop remove Text from image outcome.

3.3 Step 3: Launch Content-Aware Fill
Are you ready for the magic? Navigate to the "Edit" menu at the top and choose "Content-Aware Fill." Photoshop will immediately open a new, dedicated workspace. On the left, you will see your image with a green overlay.
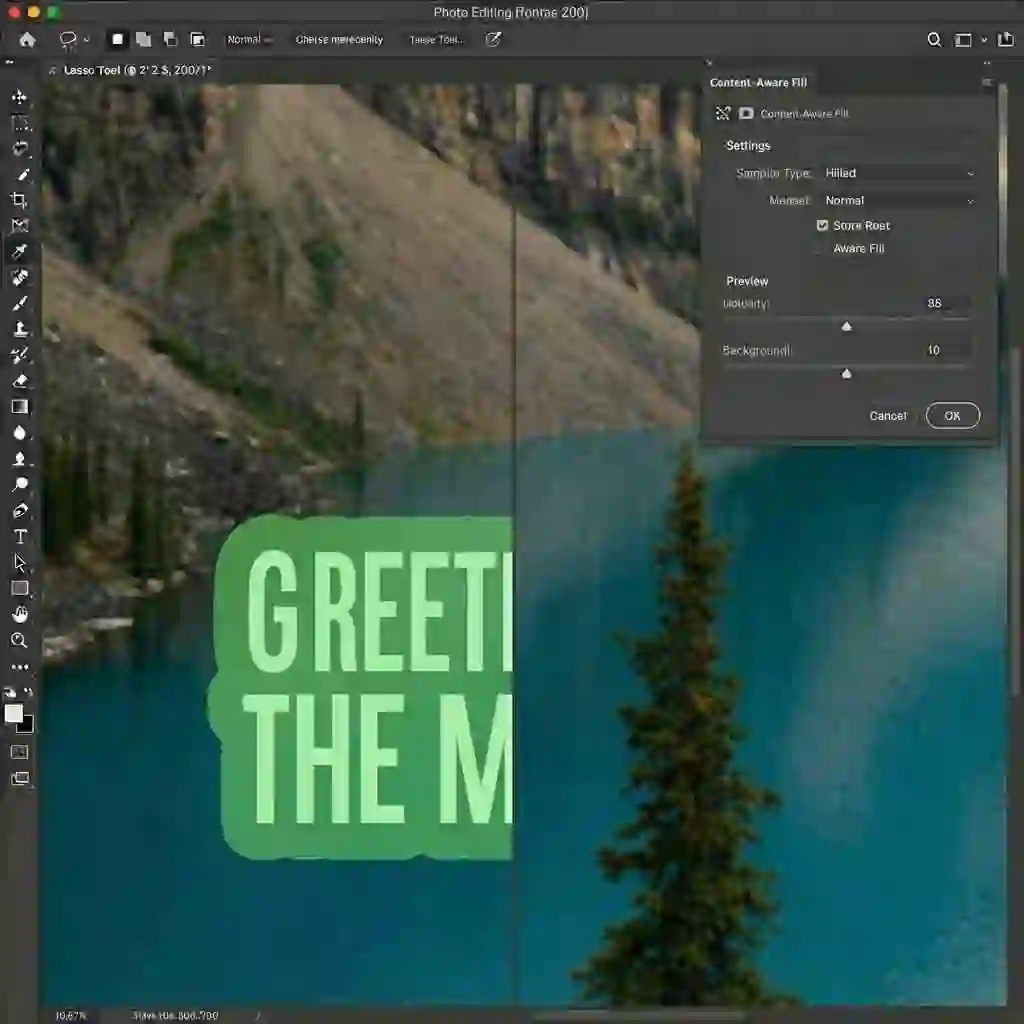
On the right, a live preview window will show the initial result of the content-aware fill text removal. This powerful feature is the cornerstone of a modern Photoshop remove Text from image workflow.
3.4 Step 4: Intelligently Refine the Sampling Area
This is the secret step to making your content-aware fill text removal look perfect. On the main image to your left, you'll see a green overlay. This green area is what Photoshop "learns" from to generate the fill. Does this area include anything you don't want it to learn from, like another person or object near the Text? If so, you must paint over it with the brush tool to remove it from the source.
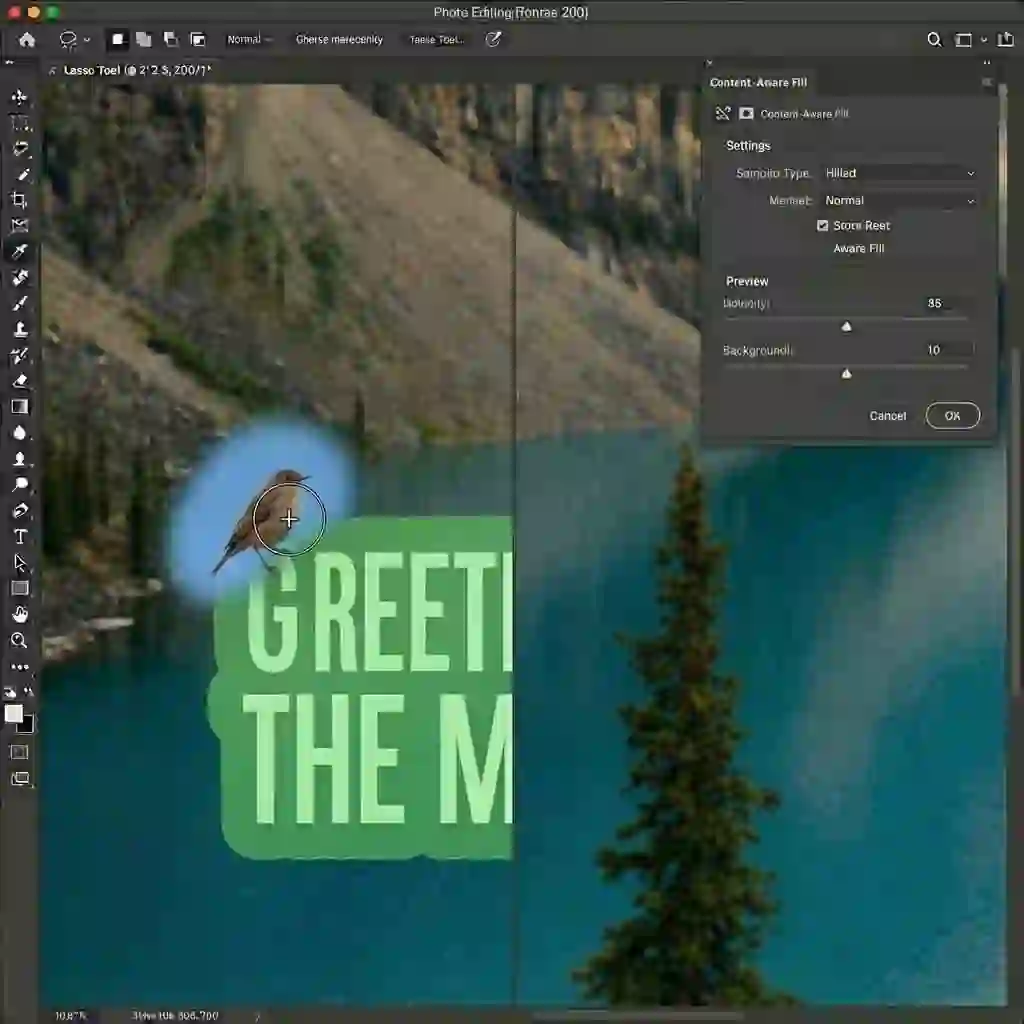
For example, if you are removing Text from a clear sky but a bird is nearby, you must paint the bird out of the green area. This ensures Photoshop only samples from a clean, relevant background. This leads to the most natural Photoshop remove Text from image effect. A great photoshop remove Text from image result depends on this.
3.5 Step 5: Output to a New Layer and Inspect
In the settings panel on the right, find the "Output Settings." Make sure you select "Output to New Layer." This is a critical non-destructive editing habit. Click "OK," and you will return to your main workspace with the Text gone. Press "Ctrl+D" (or "Cmd+D" on a Mac) to deselect.
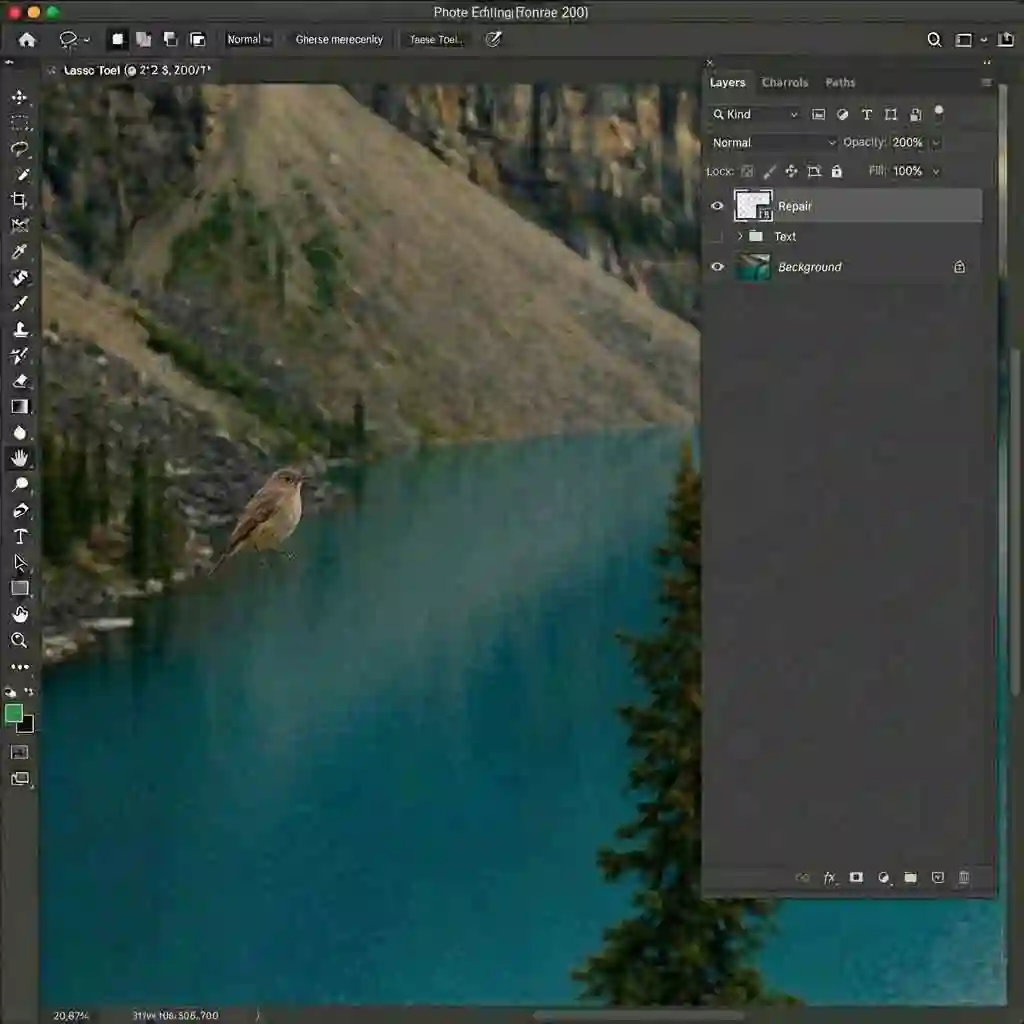
Now, zoom in and carefully inspect the repaired area. Look for any unnatural repeating patterns or blurry spots. Thanks to this powerful workflow, you can complete 95% of photoshop remove Text from image tasks at this stage.
You have performed a professional photoshop remove Text from image edit. You have erased the Text without damaging the background. This is the true power of a modern photoshop remove Text from image process.
Here is a more detailed discussion on PS operations involving technical details on how to remove original text and replace it with new text. It covers masks and layer blending modes, suitable for advanced learners looking to photoshop remove text from image professionally.
way to remove the text and replace it with my own
4.Advanced Technique: Using Photoshop Clone Stamp Text for Complex Backgrounds
Content-Aware Fill is powerful. However, it can fail when Text is placed over complex patterns or repeating textures. These include fabric, wood grain, or wallpaper.
For these situations, we need a tool with more control: the Clone Stamp. This tool is the ultimate weapon for detailed photoshop remove Text from image jobs. It allows you to repair an image like an artist and is an essential part of every professional's toolkit.
4.1 How the Clone Stamp Tool Works
The concept behind the Clone Stamp Tool is simple. It copies pixels from one area of an image and "paints" them onto another. You simply hold the "Alt" key (or the "Option" key on a Mac) and left-click on a clean area of the background to set a "source point."
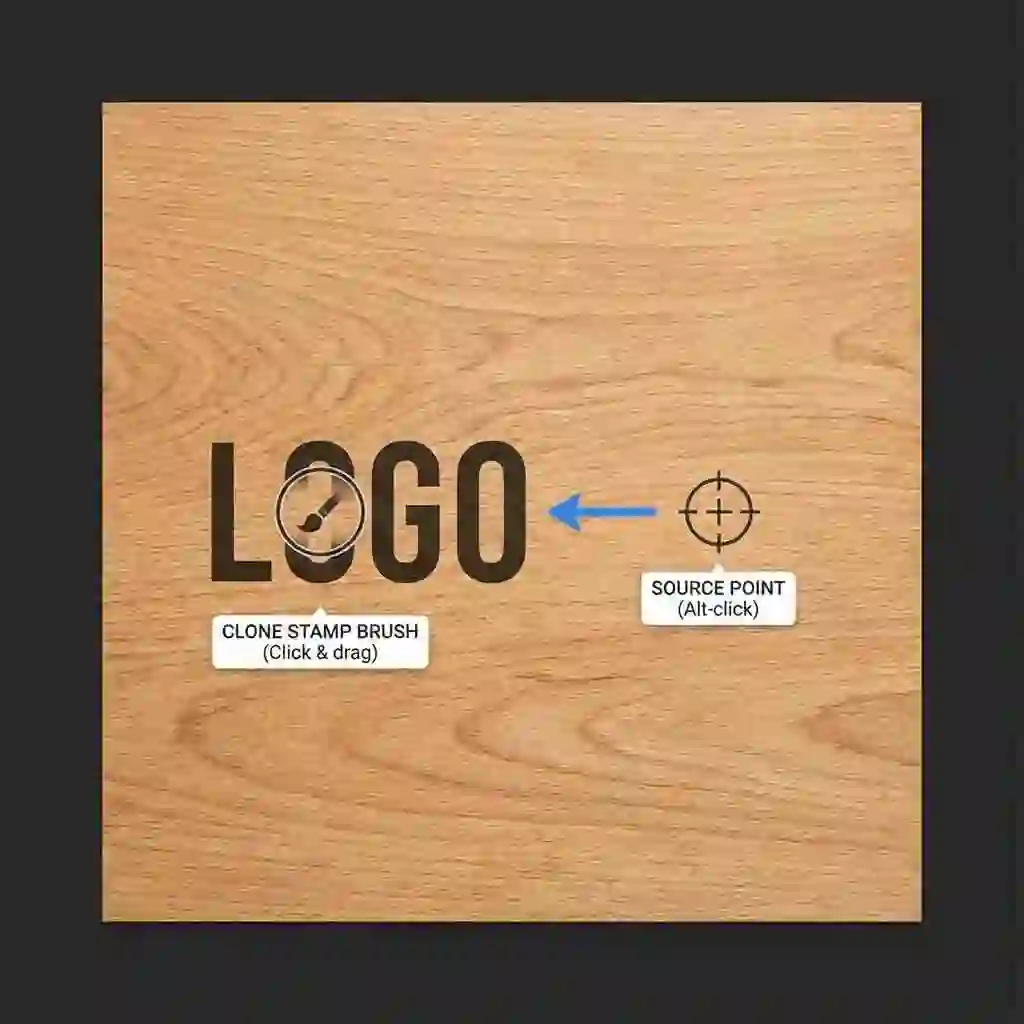
Then, you release the "Alt" key and paint over the Text you want to cover. This process is the core of manual photoshop clone stamp text work. It gives you pixel-level control over every photoshop remove Text from image edit.
4.2 Practical Example: Removing Text from a Patterned Background
Imagine you need to remove a logo from a plaid shirt. First, select the Clone Stamp Tool. Hold "Alt" and click on a clean part of the plaid pattern, right next to the logo. Then, carefully paint over a small section of the logo.
The key is this: you must resample frequently. After every few strokes, re-sample by "Alt-clicking" a new source point. This new point should match the pattern you are trying to recreate. This cycle of sampling and painting perfectly rebuilds the background. This is a crucial step for any complex photoshop remove Text from image task.
4.3 Adjusting Hardness and Opacity
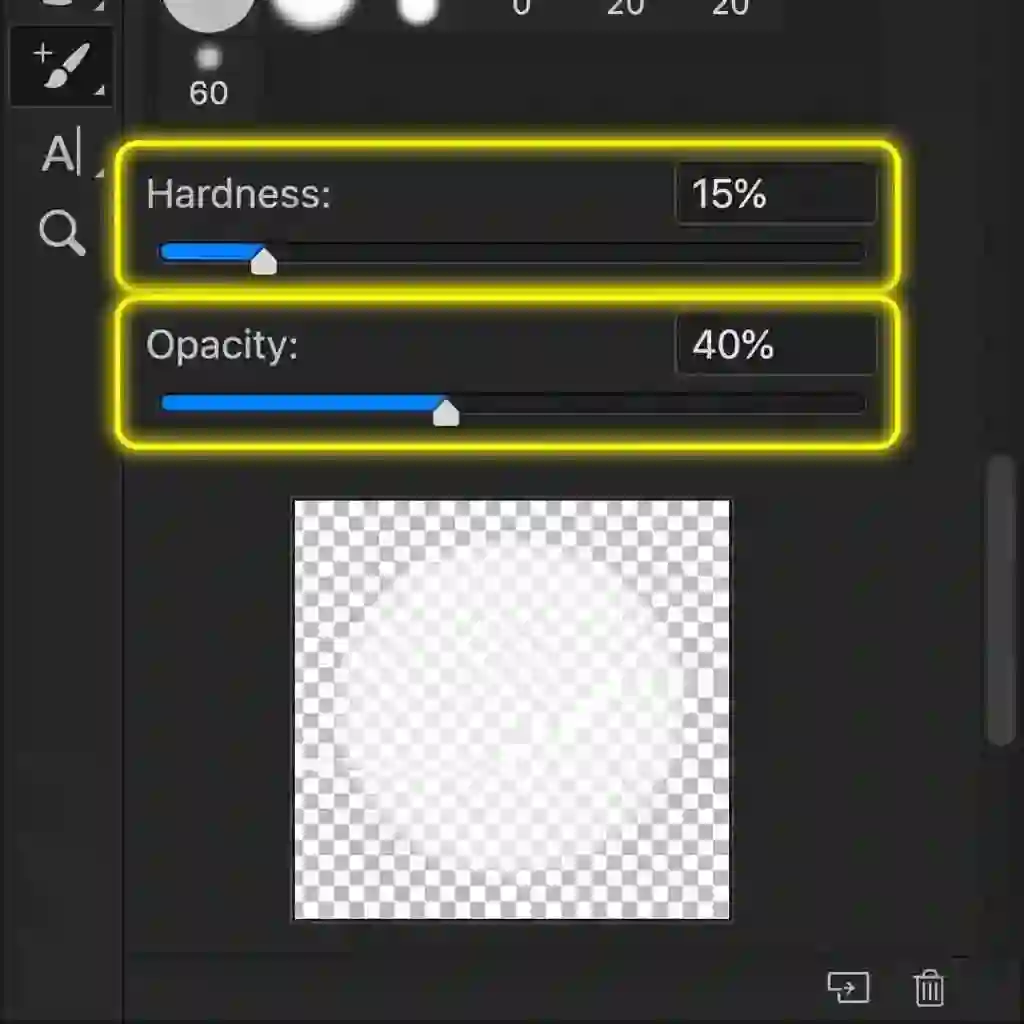
To make your repair look seamless, you must adjust your brush settings. Set the brush "Hardness" to a low value, around 0-20%. This creates a soft edge. It allows your repair to blend naturally with the surrounding background.
Additionally, lower the "Opacity" to around 30-50%. This lets you build up the pixels in layers, like watercolor painting. You avoid applying a harsh, solid block of color all at once. These settings are the secret to erasing Text without damaging the background. They are essential for delicate tasks like removing a logo from a photo.
4.4 The Pro Workflow: Combine Tools
Here is a professional workflow that will dramatically boost your efficiency. When you face a complicated photoshop remove Text from image challenge, do not rely on a single tool. First, use Content-Aware Fill to do 80% of the heavy lifting and quickly remove the bulk of the Text. It might leave some imperfections, but that's okay.
Then, switch to the Clone Stamp Tool. Use it to finely repair the remaining 20% of flaws. This combined approach is the fastest and most effective way to tackle any tough photoshop remove Text from image problem. It will give you the confidence to handle any image.
This video explains manual text removal techniques in detail, including how to handle background blending—a crucial skill when you need to photoshop remove text from image with high precision.
How To Remove Text From An Image In Photoshop
5.Special Challenges: How to Remove Logo from Photo Like a Pro
We have mastered removing solid Text, but real-world challenges are often more complex. Removing a logo from a photo is a widespread request.
However, it is significantly more complicated than simple text removal. Creators design logos and watermarks to be intricate. This requires us to use more advanced tools and strategies. To have a complete Photoshop remove Text from image skill set, you must be able to handle these complex situations.
5.1 Why Logos Are Harder Than Plain Text
Unlike solid Text, logos often contain many elements. This makes removal tricky. First, they feature color gradients instead of a single, flat color.
Second, many logos include graphic elements and complex shapes. The most problematic issue is transparency. Many watermarks and logos are semi-transparent. Their pixels blend with the background pixels. This makes a simple cover-up impossible.

If you don't know how to remove a logo, check out this TikTok video. It provides a detailed demonstration of the entire process to remove logos and text, serving as a quick visual guide for those learning to photoshop remove text from image.
How to Remove Text, Logos from Photos in Photoshop
5.2 The Magic of the Healing Brush and Patch Tool
Sometimes the Clone Stamp cannot blend the background nicely. The Healing Brush and Patch Tool come to the rescue. They are the intelligent next step for any task of cleaning up Text in a picture. The Healing Brush Tool works like the Clone Stamp (Alt-click to sample).
But it does more than copy pixels. It blends the texture, lighting, and shading of the sampled pixels. It matches the color and tone of the destination area. The Patch Tool takes this a step further. Draw a selection around the flaw. Then, drag that selection to a clean background area. Photoshop handles the blending for you.
5.3 Case Study: Removing a Semi-Transparent Watermark
Let's tackle a classic photoshop remove Text from image case. We will remove a semi-transparent photographer's watermark. It is in the corner of a landscape photo. First, roughly select the watermark. Run a content-aware fill text removal. This will remove the bulk of the watermark.
However, it will likely leave behind a "ghost." This is an area with unnatural color or brightness. This happens because the semi-transparent pixels confused the fill algorithm. Next, select the Healing Brush Tool. Hold the "Alt" key. Sample a clean area with a matching texture right next to the ghosted patch.
Then, paint over the ghosted area. You will see the brush replace the bad texture with a good one. It preserves the original color and the transition of light. This makes the repair look far more natural. Finally, tiny imperfections or pattern misalignments might remain.
Use the Clone Stamp Tool (at a low opacity). Use it for the final pixel-level touch-ups. This ensures a perfect result. This multi-tool workflow is the secret. Professionals use it for complex tasks, such as removing a logo from a photo. It is a hallmark of mastering photoshop remove Text from image.
6.The Final Step: How to Clean Up Pictures for a Seamless Finish
You have removed the Text. But that doesn't mean the job is finished. This final 5% of detailed work makes the most significant difference. It separates a professional from an amateur. The techniques in this chapter ensure quality. Your photoshop remove Text from image edit will be effective. In fact, it will be completely undetectable.
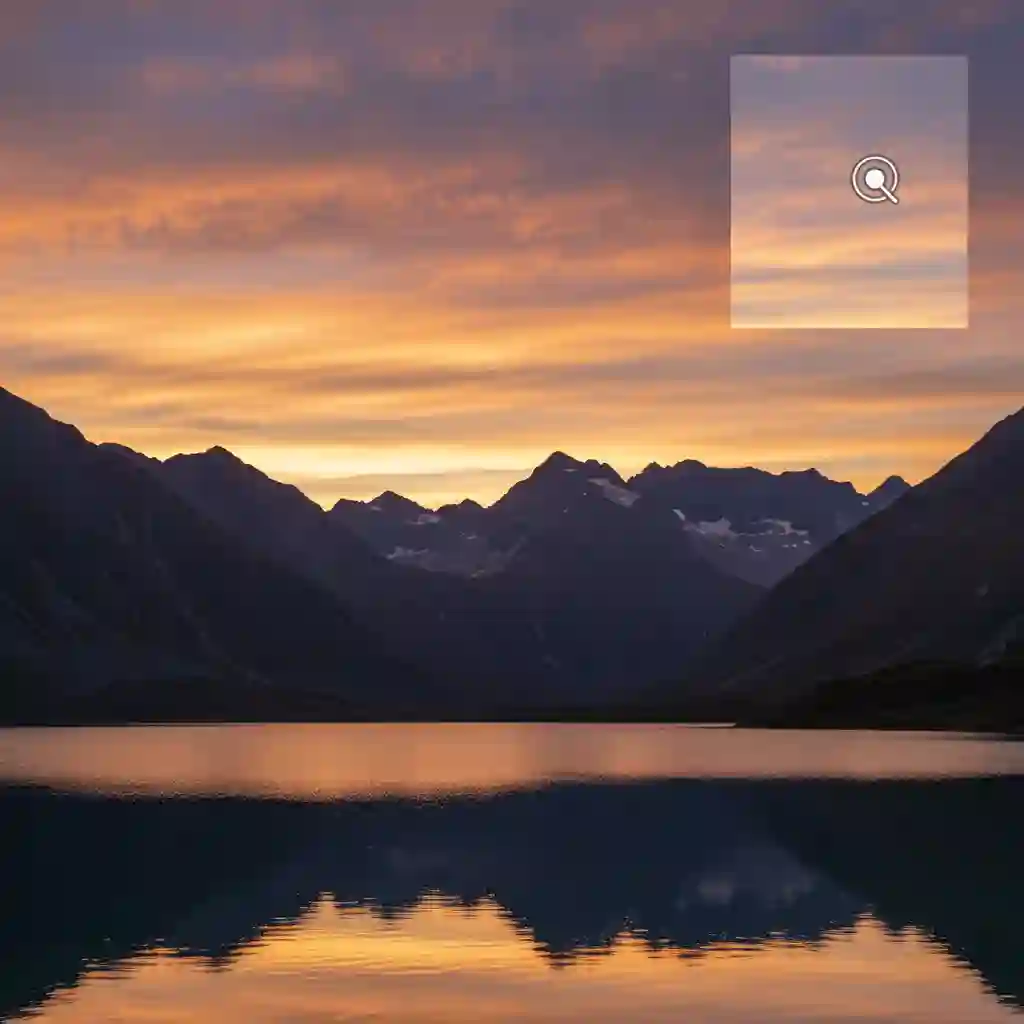
6.1 The Pixel-Level Inspection
Never declare victory at a 100% view. Press "Ctrl" and "+" to zoom your image in to 200% or even 300%. Slowly and carefully inspect the area you have repaired. You are looking for unnatural repeating patterns or blurry edges. Content-Aware Fill or the Clone Stamp might have left these behind. This is the first step in any professional cleanup process for pictures.
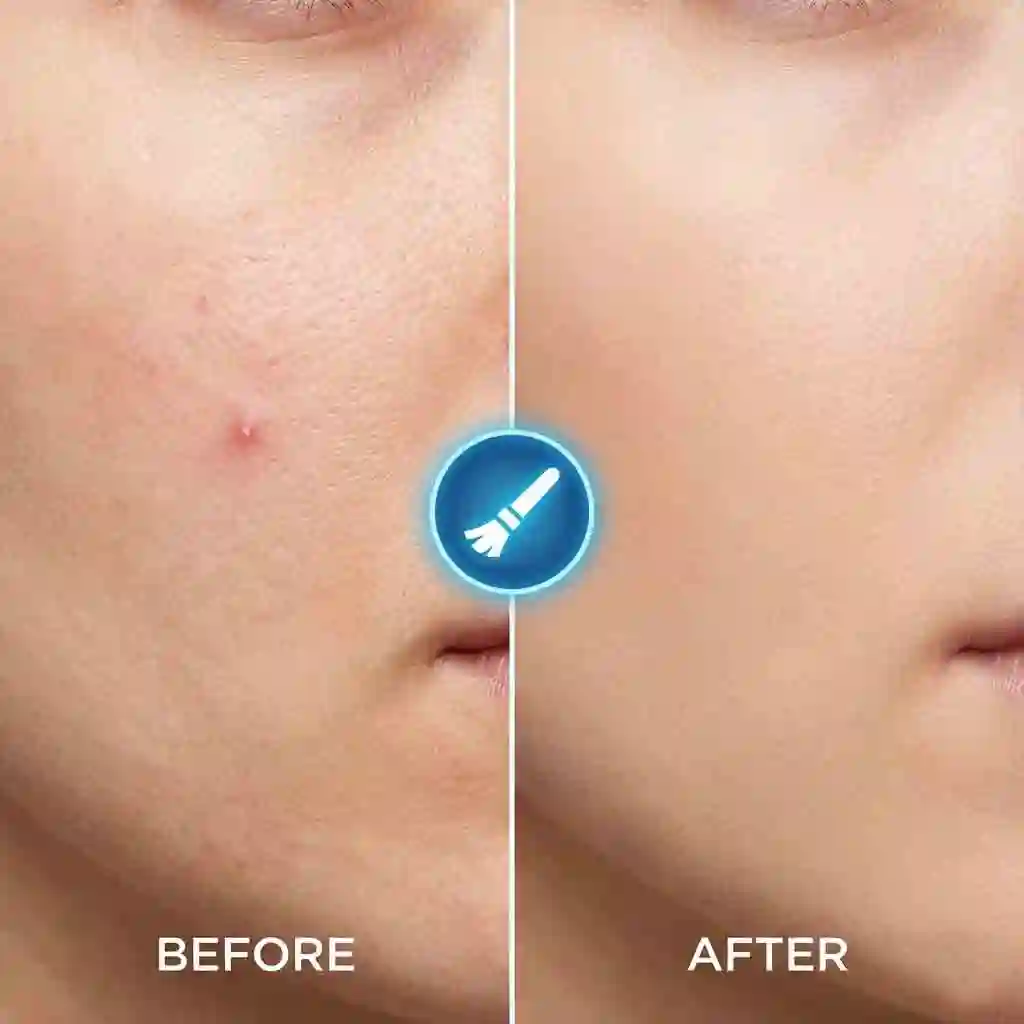
6.2 Use the Spot Healing Brush
During your zoomed-in inspection, you might find tiny imperfections. These could be a small dark spot or an oddly colored pixel. There is no need for complex tools here. Select the Spot Healing Brush Tool, which works like a magic eraser. A simple click on these tiny flaws will let Photoshop remove them intelligently. It's the fastest way to clean up Text in a picture.

6.3 Add a Touch of Noise
This is a professional secret that will elevate your results to the next level. Most digital photos have a tiny amount of grain or noise. Your newly repaired area is "too" clean, which can make it stand out under close inspection. To fix this, select your repair layer. Go to "Filter" > "Noise" > "Add Noise." Set the amount to a very low value, like 1% to 2%, and choose "Gaussian" and "Monochromatic."
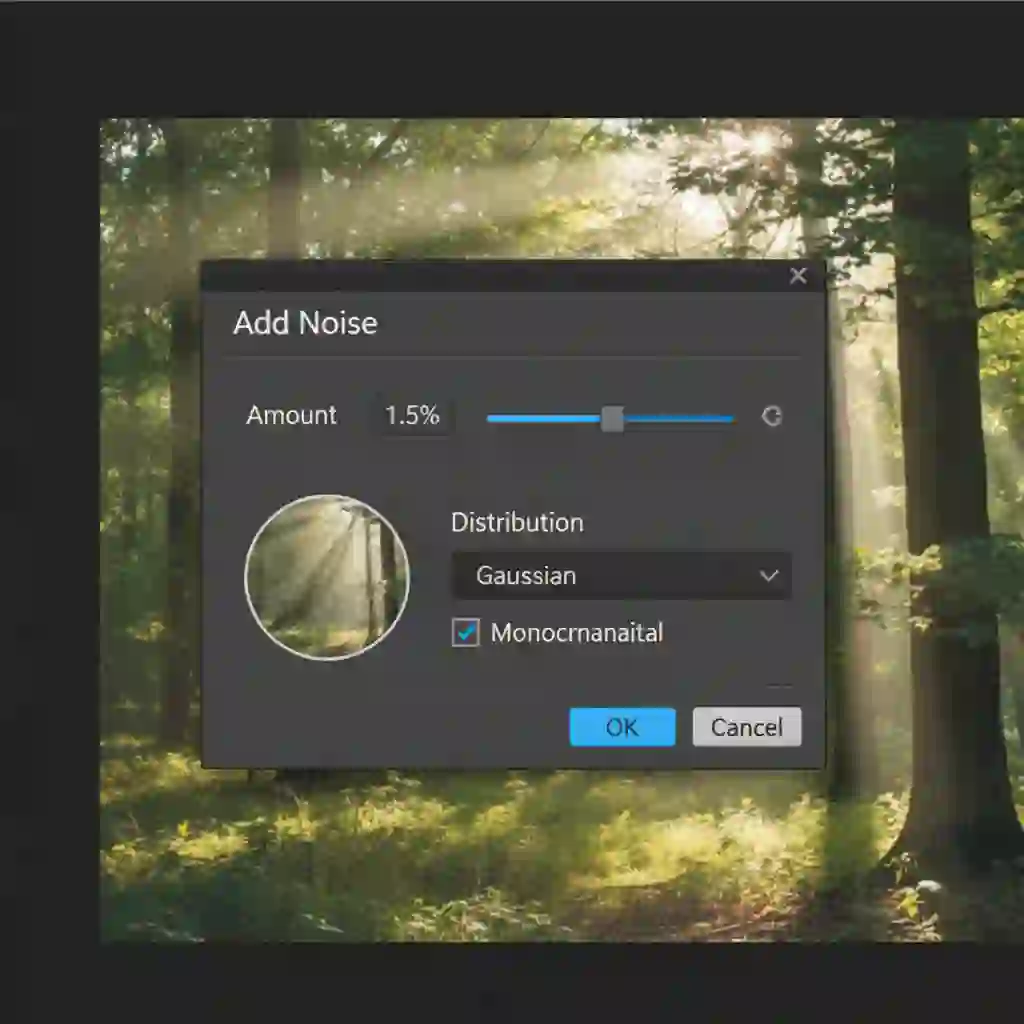
This tiny action helps you perfectly erase Text without damaging the background. It works by matching the texture of the new pixels to that of the old ones. This makes your photoshop remove Text from image result flawless, even at the pixel level. After this step, your photoshop remove Text from image work is complete.
7.You Have Mastered the Core Skills of Photoshop Remove Text From Image
7.1 A Recap of Your New Skills
You have learned the entire process. It ranges from prep work to professional inspection. You know the one-click magic of Content-Aware Fill. You know the pixel-level precision of the Clone Stamp.
You now understand the complete workflow for a professional photoshop remove Text from image. This combination of techniques is powerful. It solves 99% of the text removal challenges you will face.
7.2 You Are No Longer A Beginner
You have followed this guide. You are no longer a novice. You no longer feel helpless against unwanted Text. You now have the skills to analyze any image. You can choose the right tool.
You can perform a high-quality photoshop remove Text from image. Trust the tools in your hands. Trust the knowledge in your mind. They are enough to tackle any project.

7.3 An Alternative for Quick Fixes
You might prefer the easiest option for specific tasks. If so, feel free to try our online tool to remove Text from image.
Our product leverages advanced AI technology to automatically remove text and repair backgrounds in seconds, maintaining clear and natural image quality without requiring any design skills. While many users look for ways to photoshop remove text from image, our tool offers an instant, automated alternative.
Try the powerful AI Text Remover tool to instantly delete unwanted text
This article details how to efficiently and seamlessly erase text from various images using the latest AI tools (including ours). It covers techniques for handling complex backgrounds, helping you master professional image cleaning methods—perfect for those wondering how to photoshop remove text from image manually.
Read the ultimate guide on how to remove text from images effortlessly
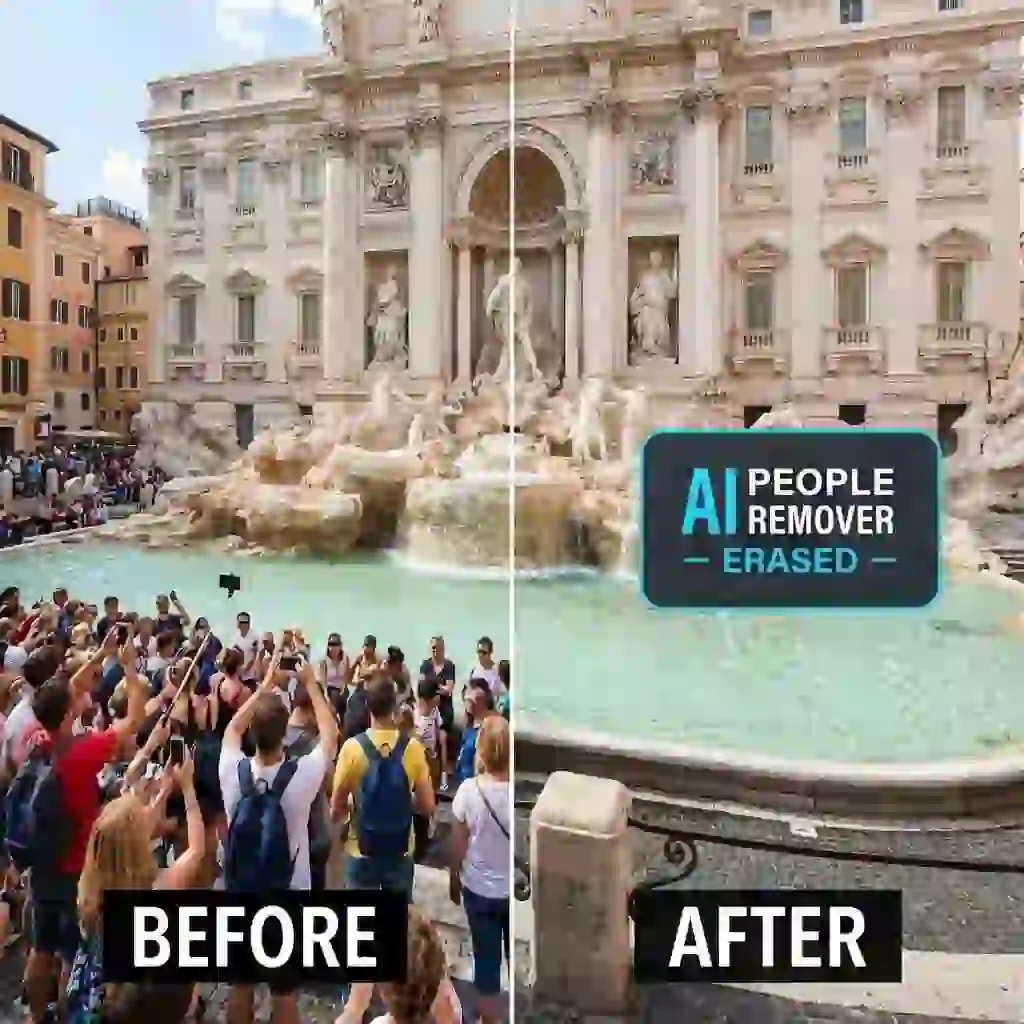
Want a perfect photo without passersby stealing the spotlight? This tool is designed specifically to clear unwanted people from your photos. It serves as a great companion tool if you find the process to photoshop remove text from image or people too time-consuming.
Use the AI-powered People Remover to erase unwanted tourists
7.4 Now It's Your Turn to Create
Knowledge becomes a skill only through practice. Don't stop at reading. Open Photoshop right now, find a photo with unwanted Text, and start your first perfect repair. Begin your journey to mastering photoshop remove Text from image today! If you run into any issues or have a great tip to share, please leave a comment below.